6.4.1
Figure 15 - Good use of tolerance (1 metre def)
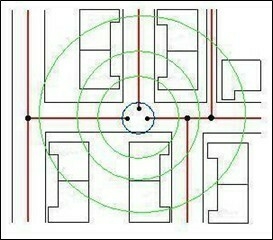
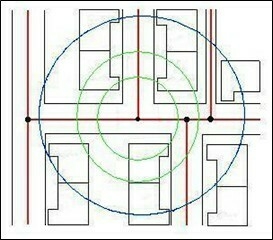
Figure 16 - Bad use of tolerance (50 metre def)
6.4.2
Figure 15 and Figure 16 show two scenarios identifying the result of using different street tolerances with the blue line representing the 1 and 50 metre tolerance.
6.4.3
Within Figure 15 the tolerance and therefore the radius of influence is set to 1 metre, therefore any other point within a 1 metre radius of the point is in the same position in the real world. This is the appropriate use of tolerance.
6.4.4
Within Figure 16 the tolerance and therefore the radius of influence is set to 50 metres, therefore any other point within a 50 metre radius of the point is the same position in the real world. This is an incorrect use of the tolerance Field because the as two other Street start points are covered by the 50 metre radius of influence leading to poor quality in network topology.